How to Find SMTP Data from cPanel
To set up either your Gmail or Business Email for a custom report sending or lead notification email, it’s necessary to configure an SMTP server. Luckily, the configuration of SMTP servers is generally very easy with SEO Audit Software.
All you have to do is simply sign up for a 14-day free trial or subscribe to any package to enter the SMTP setting at app.seoaudit.software. Free users can’t configure the SMTP.
First, go to Manage Account > Settings > SMTP Setting. Here you will find out all the necessary settings to configure SMTP for your Gmail, Yahoo, or Business Email.
How to set SMTP using Gmail?
To set the SMTP server for your Gmail account, follow the below steps. Before starting make sure your Gmail account has 2-step verification and App Password enabled. Because we need it for SMTP configuration.
- SMTP HOST: smtp.gmail.com
- SMTP PORT: If you’re using SSL, then it would be 465. And if you’re using TLS, then enter 587
- SECURITY: SMTP security is required for securing your email-sending connection. You can send email to anyone inside or outside your business if you connect using SSL or TLS. Choose TLS or SSL, that you’re currently in.
- SMTP USER NAME: Enter your Gmail Address.
- SMTP PASSWORD: Here you’ve to enter your App password which is configured in the Google account. To find out your App Password follow the below steps:
-
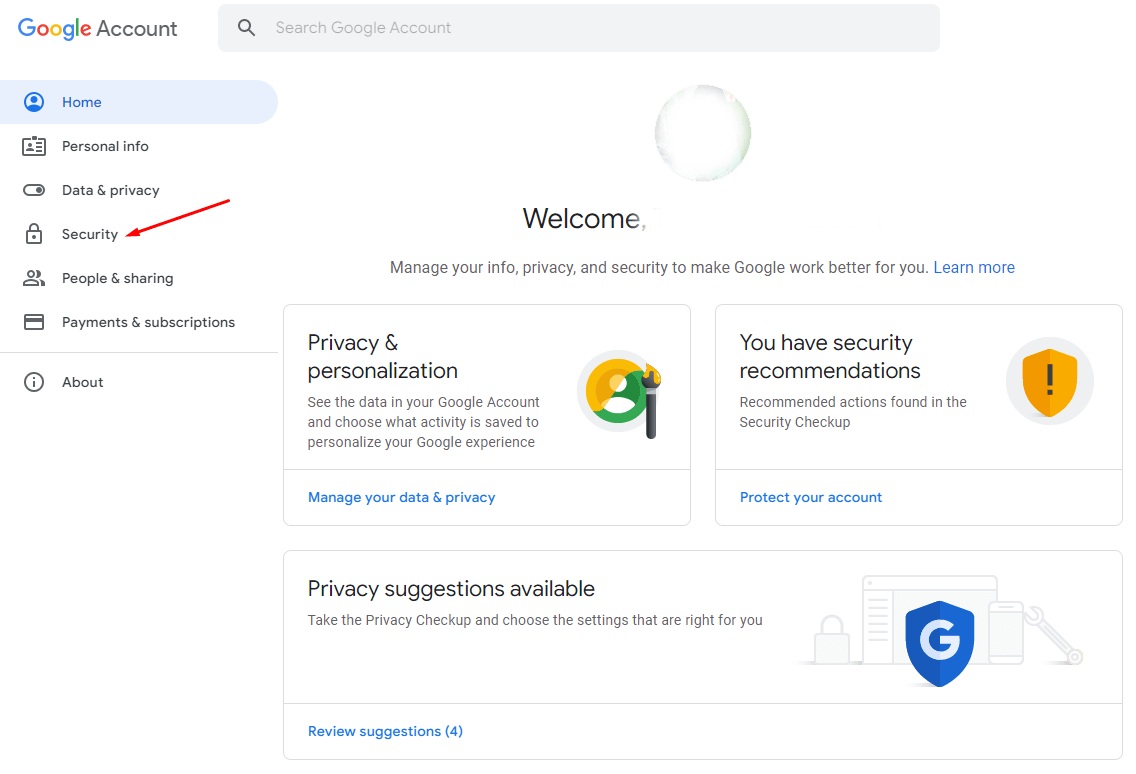
Go to Google Account > Security

-
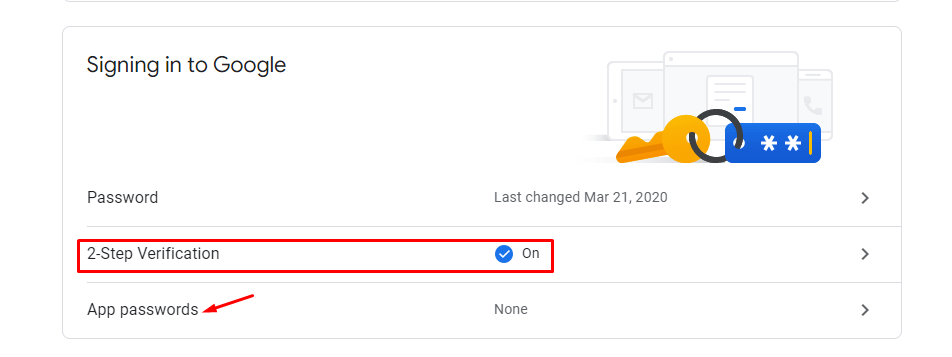
Select App Passwords below the ‘Signing in to Google’ section. If you don’t find yours that is because your account does not have 2-Step Verification enabled. So first set up 2-Step Verification.
-
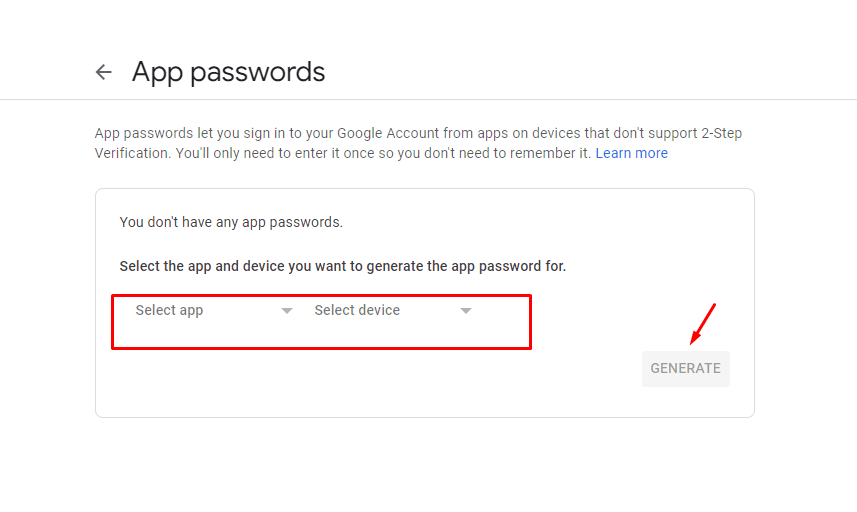
After selecting App Passwords here you may need to enter your Google Account Password again. Then select the app and device. And then click on ‘Generate’. You will have your App password.
- From the ‘Select App’ dropdown menu, choose the app you’re using or you can add a custom app name.
-
And for the select device, select the one you’re using or just enter a custom device name.
Note: In the case of the Custom name for App and Device, just one app or device selection is needed. The selection of App or Device has no influence on the app password. They are just used for your personal reference and for Google to apply the proper instruction for the next step. - And then click on the ‘Generate’ button. You will have your App password.
- SENDER NAME: Write whichever name you like. It will appear on the email notification.
- SENDER EMAIL: Enter your Gmail Address. Please keep in mind that if you enter a different Sender email from the Username, your emails can be marked as spam.
Now copy the 16-digit app password and paste it onto the ‘SMTP PASSWORD’.
Now click on the ‘Save & Verify SMTP’ button. Your SMTP configuration is successfully completed. Please check your Gmail account for any verification mail to complete the SMTP configuration.
How to set SMTP from cPanel?
Now for the Business Email, you need to first set up SMTP in cPanel, Ajenti, Froxlor, CentOS, or Plesk – anything of your choice.
Here we’ve shared how you can set up SMTP in cPanel.
-
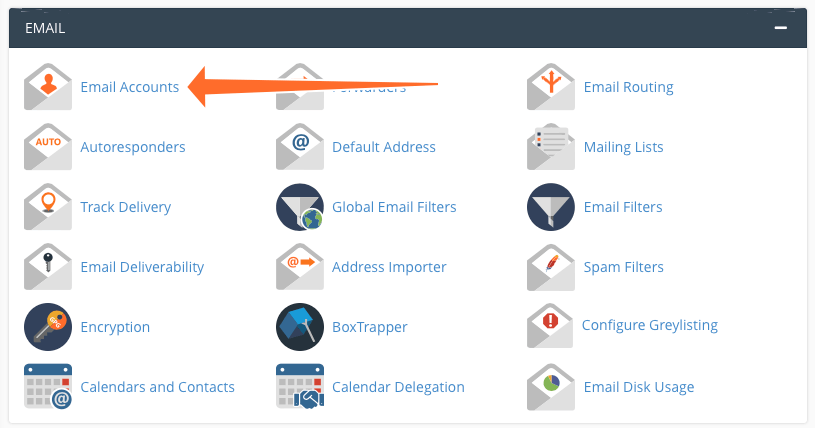
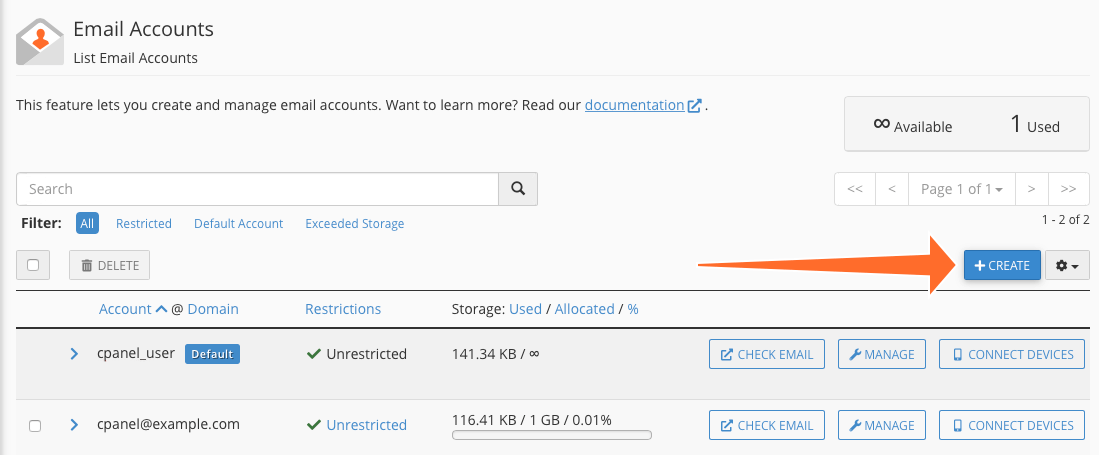
First, you have to create an email account on the cPanel
-
Then select domain, username, and password and click create to generate a new account
-
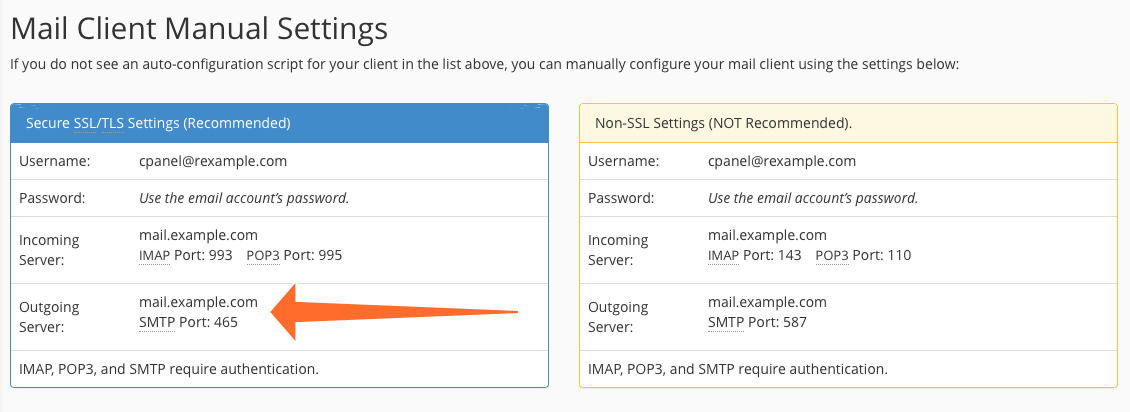
Now click ‘Connect Devices’ to find out the cPanel SMTP settings. Here you will find the username, SMTP Host (outgoing server), and SMTP port. This information you need to configure SMTP on app.seoaudit.software.
- We recommend you select SSL or TLS to secure the setting.
Now that you are all set up let’s start configuring your Business Email SMTP on app.seoaudit.software.
→ SMTP HOST: mail.yourbusinessname.com (you will find it at the cPanel connect devices interface)
→ SMTP PORT: 465 (with secure setting) (you will find it at the cPanel connect devices interface)
→ SECURITY: TLS or SSL that your email account is enabled with
→ SMTP USER NAME: Enter the user name created on cPanel. For eg. [email protected]
→ SMTP PASSWORD: Use the email account password
→ SENDER NAME: Write whichever name you like.
→ SENDER EMAIL: Enter the email address from the username.
After filling up the information now click on ‘Save & Verify SMTP’ button to successfully complete your SMTP configuration. If you want you can send a test email from Manage Account > Settings > Email notification, to verify the SMTP configuration.